How to Record a Podcast on Zoom [Step by Step Guide]
Technology has developed over the past few decades. Thus, we have almost everything at our fingertips. And the credit goes to the internet. Remote podcasting is not a new term. And many podcasters, both new and existing, are embracing it to make their shows lively. Zoom is a popular platform to record podcasts. It allows call recording for podcasting. Thus, many podcasters are using it to fulfilling their purpose.
This article will guide you on how to record a podcast on Zoom:
The recommended settings to record a podcast on zoom
After you and your guests are ready with the microphones, you may want to proceed with the recordings. But, before that, you will have to take care of a few settings. It will improve the audio quality of your podcast. Echoes and background noises cause interference. To avoid it:
- Click on “Settings.”
- Navigate to “Audio.”
- Tap on “Advanced.”
- Now, opt for the option of “Show in-meeting to ‘Enable Original Sound’ from the microphone.”
- Click on the “Disable echo cancellation option” and the “High fidelity music mode.”
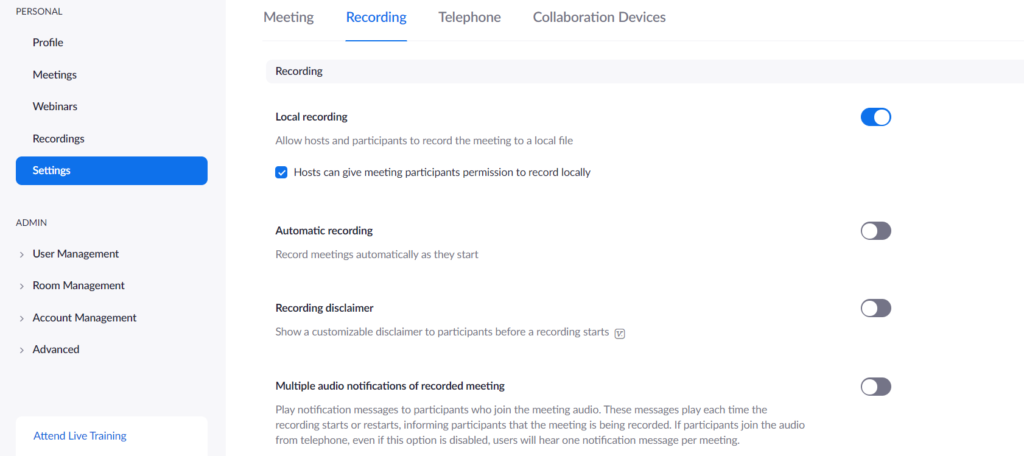
It will make your audio sound more natural. You may also disable “Automatic Gain Control” to remove the voice dynamics. And you may also want to turn off the “Suppress background noise” according to your needs. Later, it makes the podcast editing process more convenient.
How to record a podcast on Zoom?
After you configure Zoom for recording, you may proceed. Before starting a call, make sure that you have the latest version. You may click on “Check for updates” for this purpose.
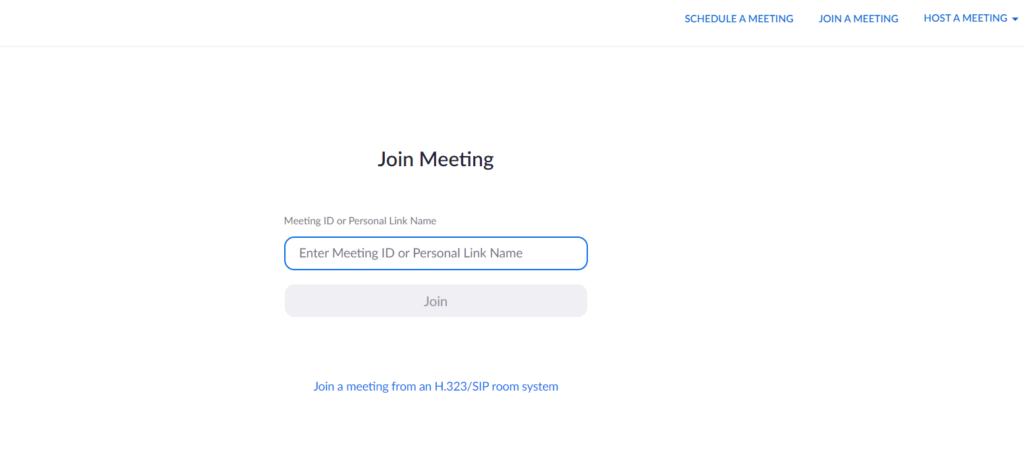
You get two options for recording a Zoom meeting. Either you can ask everyone to record their audio. And later you may ask them to send it to you. Or you can record it through zoom.
To record a podcast on zoom, follow the below down steps:
Step 1: To begin or start with your call recording, click on ‘New Meeting.’ This button will allow you to access the control set. These buttons help you to get better control of the call. Open and Close chat panel, Mute Button, and Camera Toggle button are the three buttons.
Step 2: Then, tap on the “Invite” button.
Step 3: Select ‘Copy invitation’ for copying the ID and Passcode.
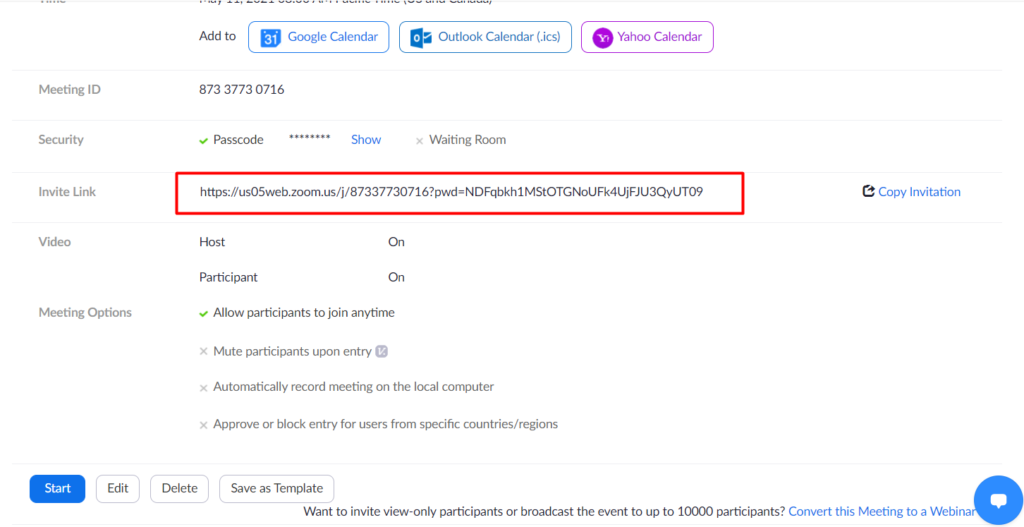
Now paste this ID and Passcode direct into a message or email and send it to your guest.
Step 4: Now, select the “manage Participants” button. This will allow you to check the participant list who have entered into the meeting.
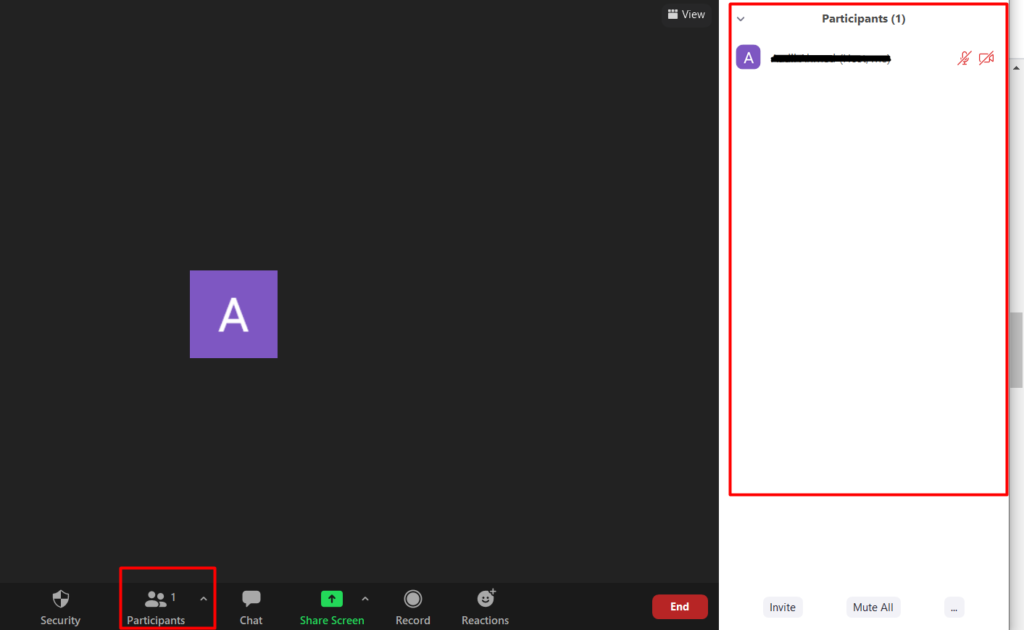
Step 5: After you get through the list of participants, you may allow them all to record the call. Call on their name on the microphone. Then tap on “More” and click on “Allow Recording.”
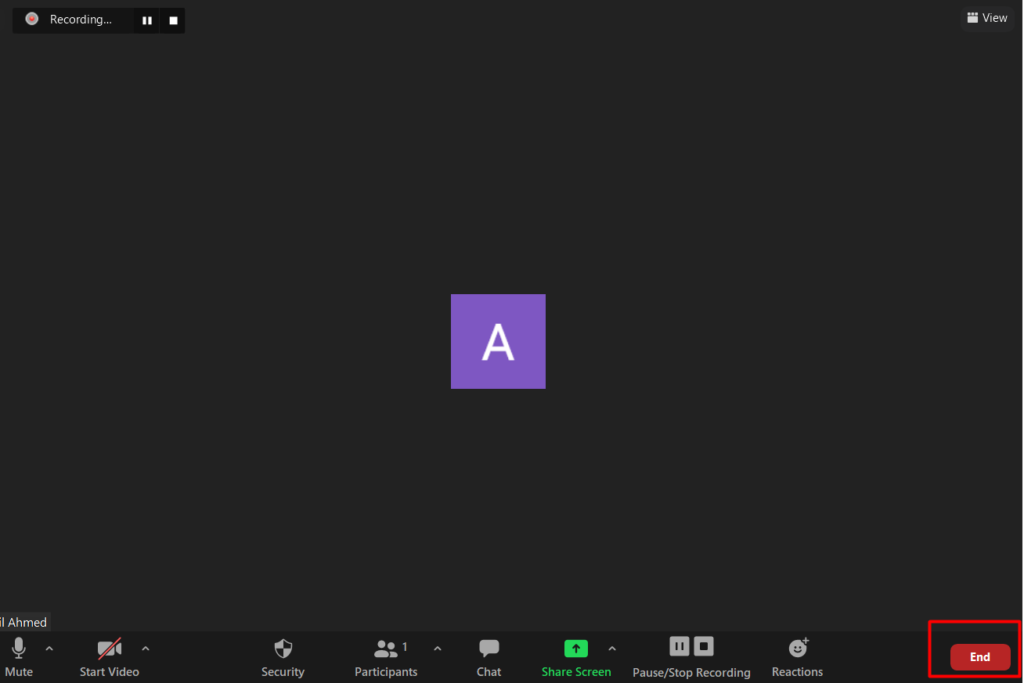
Step 6: In the top left, you will see the “Turn on original sound” option. Turn it on to get a high-quality recording. Recommend all the participants to do the same. Perform a quick check to make sure that all the microphones are functioning. Check for a red recording bubble beside your participant’s name.
Step 7: Now, after the session, you need to end the meeting. Click on ‘End Meeting,’ and tap “End Meeting for All.”
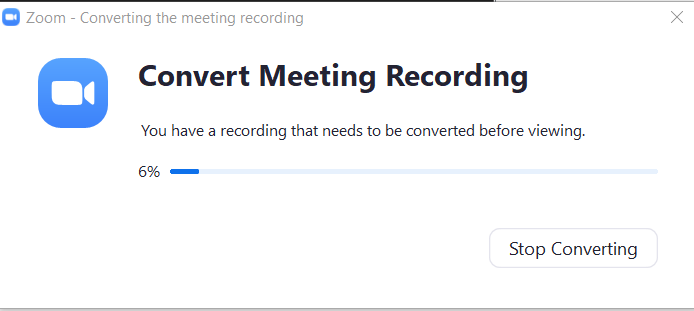
Step 8: As soon as you end the meeting, Zoom will start to convert your meeting recording tracks. And will further prepare to save them. Ask your guests to stay until this process ends. Or else you may lose recordings.
Step 9: Choose a location to save these recordings. And finally, hit the “Save” button.
Read Also: Dynamic vs. Condenser Microphone | How to Choose for Podcasting
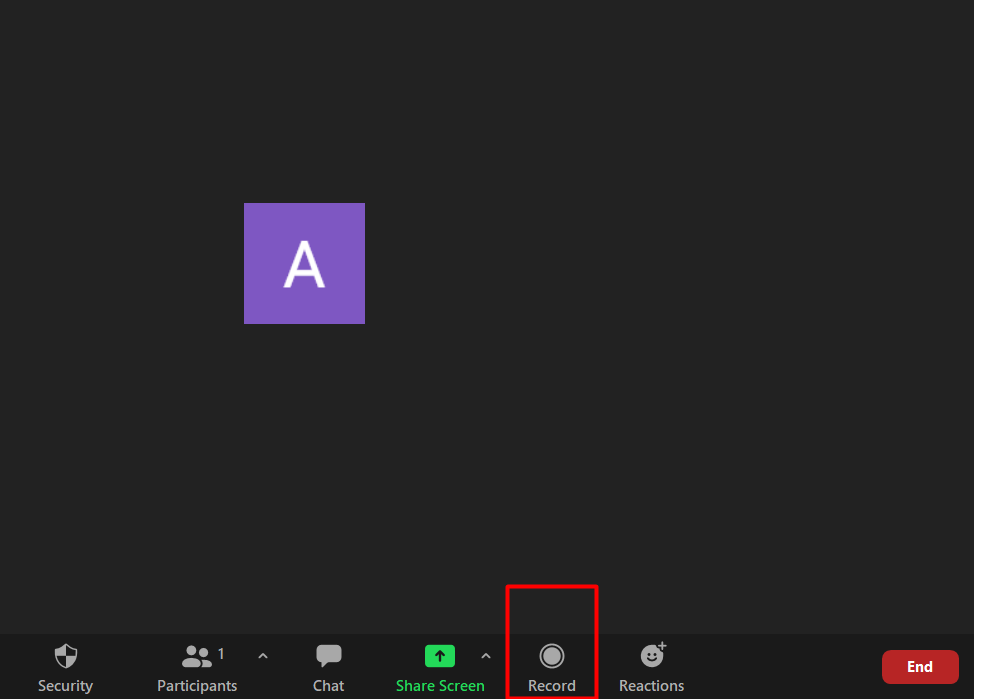
When you are the host, recording a zoom call for podcasting becomes the easiest for you. Locate the “Record” option, and click on it. Zoom will notify all the guests that the call is being recorded. Even if anyone joins the meeting afterward, they will still get the notification.
How to record a podcast on Zoom if you are not the host?
You may want to record a zoom meeting, even if you are not the host. Well, then get permission from the host to be on the call. Or you may ask the host to add you as an “alternative host.”
If the Zoom plan of the host supports cloud recording, he or she can use it. The host may enable automatic cloud recording for the Zoom meeting. Nevertheless, the host must enable the “join before host” option. This setting will start to record as soon as the first guest joins the call.
Read Also: Podcast Events to Look Out for in 2021 [Infographic]
How to record a podcast on Zoom automatically?
To record a zoom call automatically, check the box “Record this meeting automatically.” You can do it when you first schedule or create the zoom call.
Record a separate audio file for every participant who talks:
Zoom, by default, will combine the audio files for you. It allows you to upload it directly. But you don’t get much control over your audio file. Editing out the unwanted crosstalk or noise becomes difficult. So, it is best to get separate audio files for each guest who speaks.
Podcast editing will become difficult later with a single track. But with separate files, you can tweak them based on your needs. You can add noise reduction, separate compression, and EQ to each of the tracks.
Keep temporary recording files:
Things may go wrong with your internet connection or computer. And you may lose your audio files.
Thus, it is better to let Zoom keep the temporary recording files so that in uncertain circumstances, you will be able to recover those tracks.
What if it is a video version?
If you opt for audio-only podcasting, you don’t need to worry about video recording settings. However, video enables you and your guests to feel more natural about the session.
The availability of bandwidth, it will make the conversation smoother and more natural. But do not sacrifice audio quality for a video.
Conclusion
Zoom is one of the most used applications nowadays. Right from the students to the most popular organizations are using it. The podcasters can use Zoom for recording their podcasts as well.
Keeping the settings optimal will improve the audio quality. Make sure to record the podcast in a silent background to avoid heavy editing afterward.

View Comments
9 Tips on how to live stream on Facebook
Technology has developed over the past few decades. Thus, we have almost everything...